CHANGING A WHEEL BEARING ASSEMBLY (Sierra)

I have found that running the Hood with "enthusiasm" does seem to wear the wheel bearing somewhat. Although the Haynes manual does cover changing these, I thought that this might help.

If this is the first time that you're trying this, allow a couple of hours for your first wheel, after that, you can probably get it down to ½ hour apiece. the method is the same for both the rear wheel bearings and the front wheel bearings.

Ok, usual thing, jack up the corner you're doing, remove the wheel and make safe on axle stands or wooden blocks, and chock the remaining wheels.

Then remove either the Callipers & disc, or the brake drum next.

Now with a sturdy bar placed between the wheels studs (you can put the nuts back on, to stop any thread damage) jam it against the floor so that you can undo the large nut on the drive shaft / stub axle. NOTE; The nearside (passenger) side is left hand thread, so is turned clockwise to undo. these nuts should be bloody tight, you will need a good socket and long bar to move it. (I use a 15/8" AF socket) Once the nut is removed, you then undo the 4 off 17mm socket sized bolts that hold the hub on. The hub will then just pull off the driveshaft / stub axle.

I am using the vice for a 'solid' support, the hub isn't held in it. Lever out the 2 oil seals, and remove the inner bearing races.

(don't throw them in the bin just yet)

remove seal.jpg (136523 bytes)
Wipe out all the old grease and you should be left with something like this, the hub casting with the two outer bearing 'shells' still fixing in place.

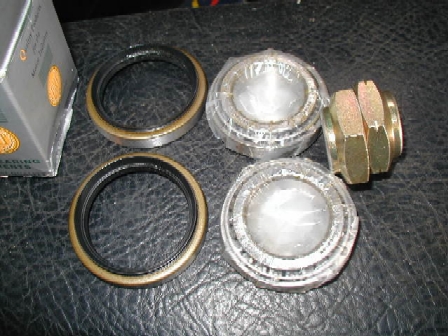
Note that the bearings don't actually back up to each other, but that there is a small shoulder between them.

outer races.jpg (152421 bytes)
With a mild steel drift, place it against the back of the bottom bearing, and give it a stiff tap, then move the drift to the other side, and tap it, keep working back & forth until that outer 'shell' has come out. knock out 1st race.jpg (134693 bytes)
OK, you've got one shell out, the other is just the same, but be careful not to put the drift against the small casting shoulder, make absolutely certain that you are only against the bearing shell. knock out 2nd race.jpg (156230 bytes)
Here we have a new bearing kit (approx. £20 [Feb 2004])

The 2 bearings are identical, as are the oil seals, but note the nuts! the LH threaded nut is the one with the little cuts out of the corners.

Some manufacturers have 2 different part numbers, one has a RH threaded nut, the other has a LH threaded nut, this manufacturer only has 1 part number, but gives you both nuts.

bearing kit.jpg (140401 bytes)

Once you've cleaned everything up, you are ready to put the new outer races in. Remove the main inner bearing roller assembly from one bearing,(Note; don't mix them up, remember which goes with which outer race)

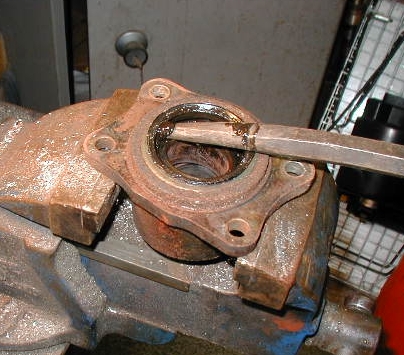
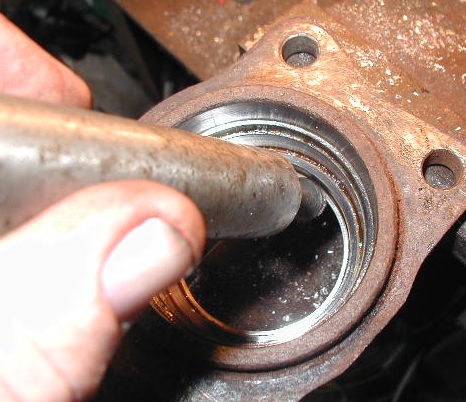
Now place the outer shell in position and, with the drift, start by gently tapping the shell into the hub, work all around the circumference of the bearing race, trying not to get it in cock-eyed. you will need to increase to strength of the 'taps' the further it goes home.

knock in 1st race.jpg (136180 bytes)
When you think that it's getting close to 'being there' turn the hub over, and have a look to see if it's up against the shoulder.

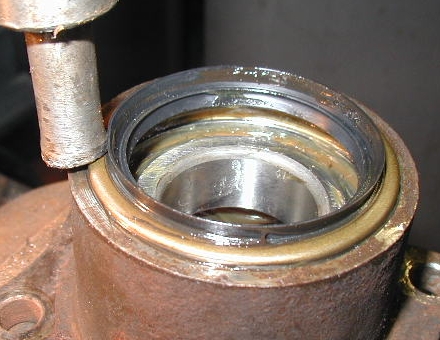
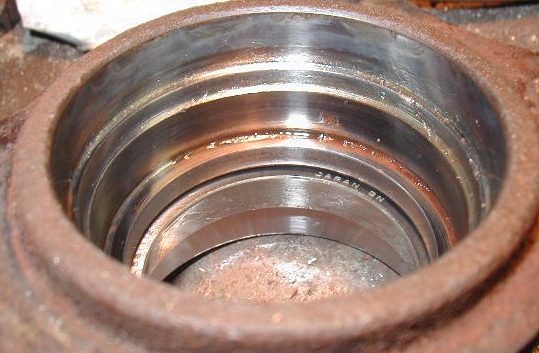
Here you can see that it's not yet up fully, there's still a gap, you can still see 'Japan' on the outer race.

As the shell gets very close to home, the top edge, where you are placing the drift, will go below a lip in the casting, be sure not to damage this lip, check each placement of the drift before you hit it.

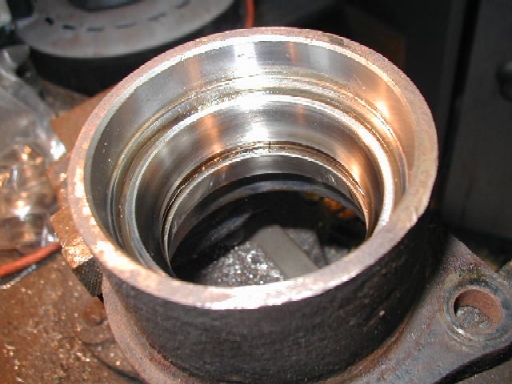
The other outer race is identical to fit, don't forget to check that both of them are fully 'home'

check for seating.jpg (162290 bytes)
Right, that's the outer shells in place. Get the bearing assembly for the side we're going to complete, and put some nice new grease into the bearing, drop the bearing into place.

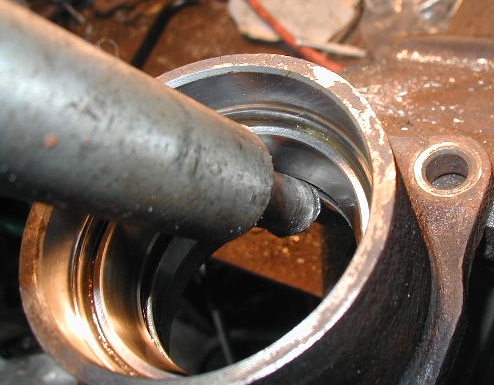
Now we will fit the oil seal. These can very easily be damaged, firstly, push it into place, you'll find that it will just 'hold' on the start chamfer. Don't start hitting the new oil seal, instead, put the old seal on it, and tap that. Be careful not to knock one side down too far, work around the circumference, tapping it down a bit at a time, keep it square.

fit oil seal.jpg (129030 bytes)
Once the seal is nearly home, but still a little bit proud of the casting, use the drift, and work all around the circumference tapping it down until it's level with the outer face of the casting.

Now turn the hub over, grease up and drop in the other bearing, then fit that oil seal.

finish fit oil seal.jpg (129545 bytes)

There you go! the hub is now ready to fit to the car again. smear the inner lips of the oil seals with a little grease (you don't want them to run dry or they'll burn up) Make sure that the thread on the driveshaft / stub axle is in good order, don't oil or locktight it, but fit the new nut and tighten up.   the torque setting for this nut is 220 ft lbs, which roughly translates to, as hard as you can with a 6ft bar! so swing on it!!