CONVERTING THE REAR SIERRA BRAKES TO DISCS
After running the car for a few months since the engine change, where I had to remove the servo, I felt that there was the opportunity to uprate the rear brakes from drums, to discs, I certainly didn't have a problem with the rear brakes locking up, this does happen sometimes with the 'normal' Sierra set up on kitcars, so changing to discs in those circumstances is certainly not recommended.
| The first thing is to jack the rear of the car up high enough, and support it, as you will need to get right under it at a later stage.
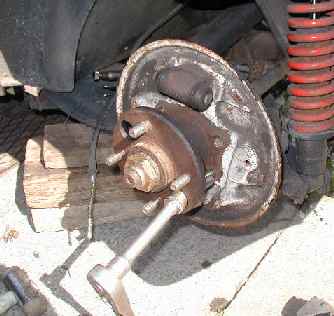
Then remove the brake shoes & springs etc. clamp the rubber brake hose, and undo and remove the brake pipe to the slave cylinder. Now remove the drive shaft, and lift out the back plate, this is easily done by removing the 4 bolts holding both the drive shaft, and the brake back plate in position. You do not need to undo the large nut on the drive shaft!
|
|
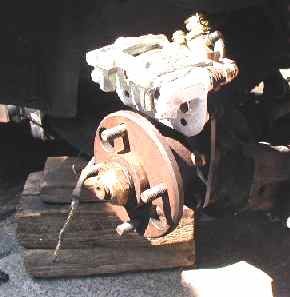
| We now replace the driveshaft, but also bolt an adapter plates in position, with the 'leg' to the rear of the car. You may need to use longer bolts in the top 2 holes to be able to re-mount the plastic shield over the driveshaft. |

|
|
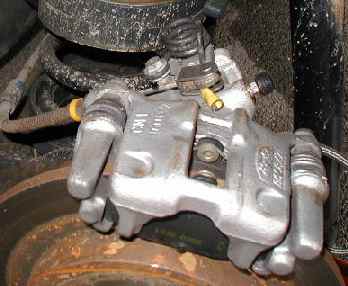
Here you can just see the plate bolted on, with the calliper assembly mounted onto it to check that it all fits.
At this point, you now need to get the small flexible brake hose that connects to the calliper, you will need to fabricate a mounting point for the other end of it. I used a large washer with the correct size bore, that allowed the hose fitting in, then I bought the genuine horse-shoe clip from Ford to hold it. The washer was then welded to the suspension in an appropriate position, and a new metal brake pipe made to finish this job.
|
|
| YOU WILL NEED TO SORT THIS OUT BEFORE CONNECTING THE BRAKE PIPES UP.
The biggest problem that I found, was how to connect the handbrake cable. The original cable from the drum brakes has 'stoppers' swaged on the ends, but for the disc's, you need 'eyes' to pull the levers. I talked with Colin King, who had already done this conversion (This is a piccy of his N/S rear) and he had used a jaw end & clevis pin from a yachting shop. ( Colin had a couple spare which I lightened him of ).
|
|
To fit them is a bit of a bugger. Firstly, your original handbrake cable will have been shortened in some way on the initial build, cut off the 'home-made' swaged end, then pull the whole inner cable out through both sides of the 'outers' Thread one jaw-end onto the cable, and thread the cable back in through first one calliper, then the outers, and around the handbrake 'yoke' until you have it at the other side of the car. Put the outer cable into the calliper and see whereabouts the jaw end needs to locate onto the inner cable. You now have to swage something onto the cable, that will stop the jaw-end coming off, and will also fit inside the jaw-end without clashing with the actuation arm. I drilled a hole through a 8mm bolt thread,to take the cable, and cut it so that it was a nice size to fit inside the jaw-end. You now need to have the calliper off it's mounting to do this, with the cable located in the calliper,and the jaw-end onto the cable, swage your 'stopper' onto the cable. I had a sledge hammer held at the side if the hub, to use as an anvil, then swaged the 'stopper' on it.
Once the cable is sorted, re-assemble everything with the disc and new pads in place, bleed the brakes, adjust the handbrake cable (just remove the 'slack' from the cable) and the job is done.
I would however suggest fitting longer wheel studs, as you have added about 8mm of brake disc now. These are available from various places, I got mine from Rally Design, 83p each +p/p +vat. knock them out one at a time, pull the new stud in place with a 12mm nut and a suitable spacer, using a long lever between the other studs, to stop the hub turning as you do it.